Painting an Olive Jar Neck Sherd from the Luna Site in Pensacola, FL

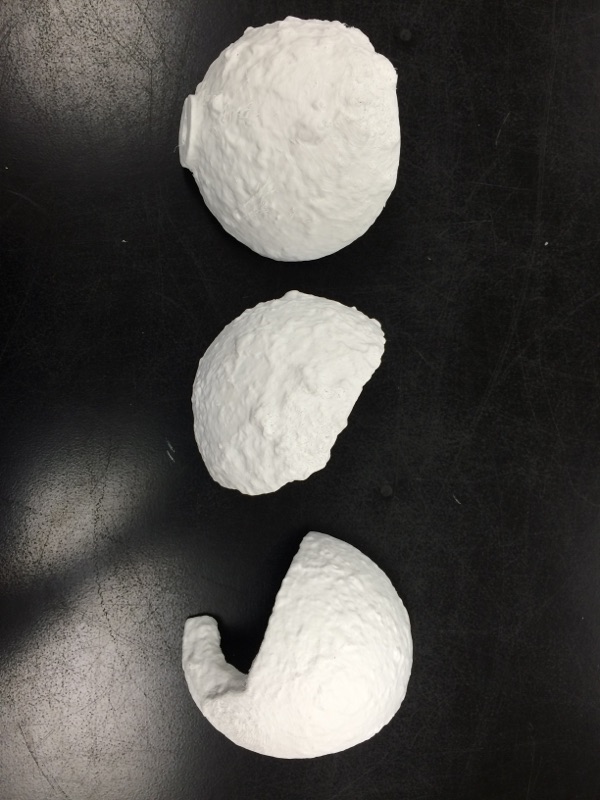
Last month, I discussed some useful tips on how to paint 3D printed plastic objects. Today, I will walk you through the painting process using an olive jar neck sherd from the Luna site. The sherd was one of the defining artifacts that helped UWF archaeologists recognize and establish the significance of the site. Below is my step-by-step guide on how to paint this specific artifact using the equipment and tips I outlined in my previous post.

  1. painting-station
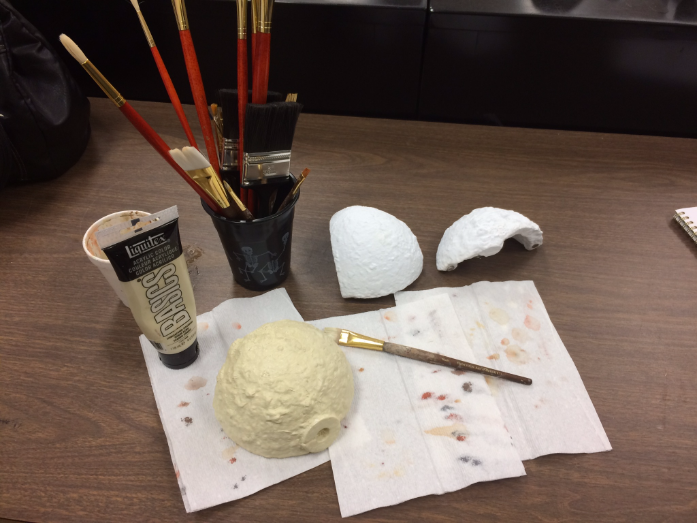
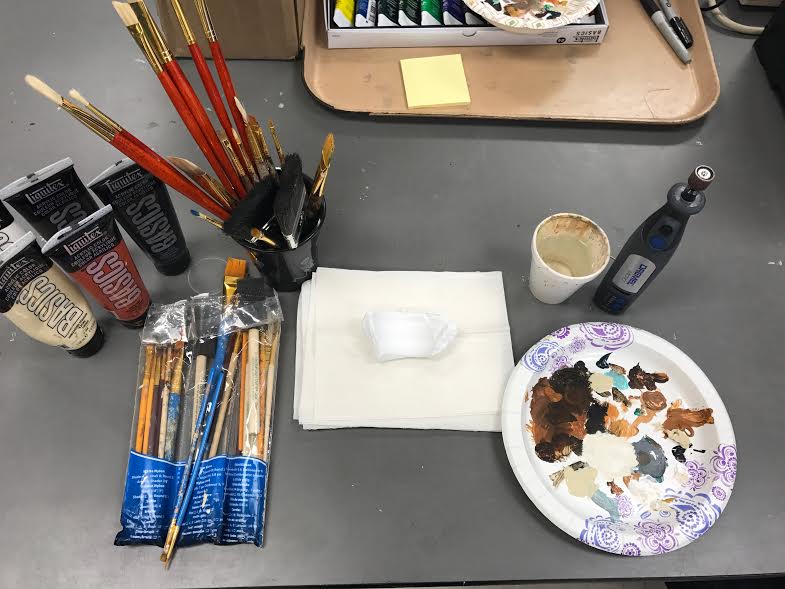
Here is my painting station, equipped with the colors I use for this artifact (minus two that I added in), paint brushes, paper towels, my “palette,” and a water cup. 
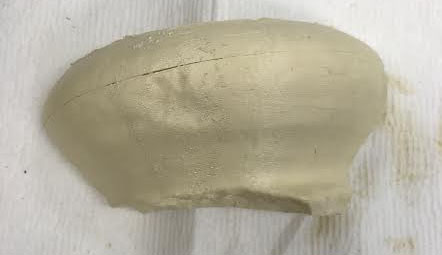
  2. I start by adding a layer of unbleached titanium over the whole object.first-layer-ubt-mariana
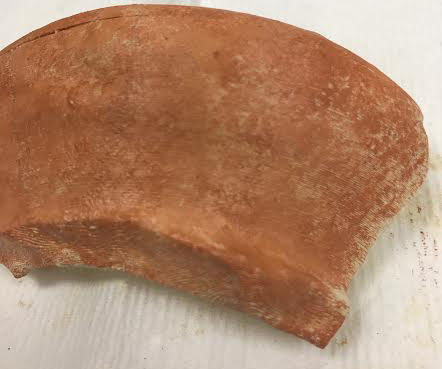
  3. Then, I mix some paints to create the reddish color of the entire vessel. I use red and yellow to create a salmon color and add bits of Unbleached Titanium and Raw Sienna. I use the dabbing technique to create texture.

    1. Here is a close-up of the texture.
      second-layer-detail-mariana
    2. Here is the entire second layer.
      second-layer-whole-mariana
  4. colors-used-for-gray
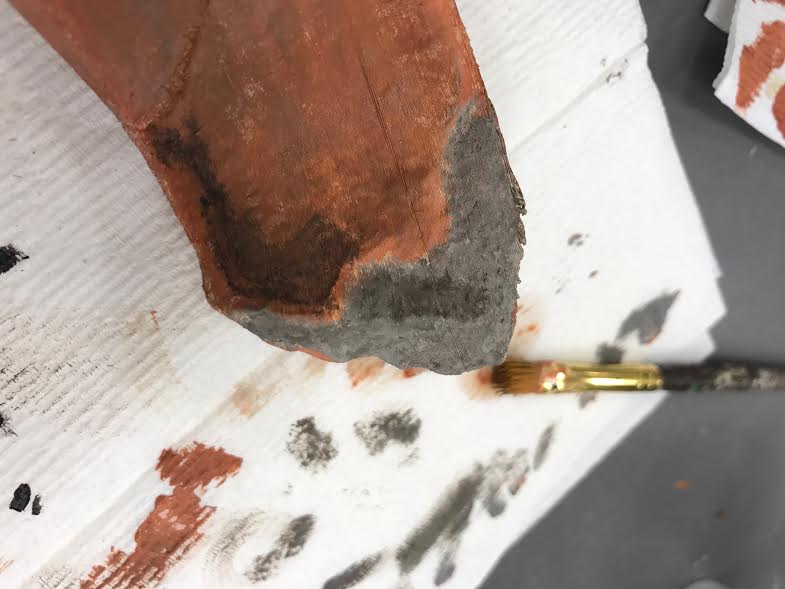
    Colors used for gray.

    I mix the colors I use for the gray sides of the artifact. I obviously do this by mixing white and gray and then paint one layer on the sides. For a second layer of gray, I add a little bit of Raw Umber to the mix, which makes it slightly more brown. When I layer it on top of the light gray color, it creates depth and texture. There is also a line of gray at the bottom of the artifact.

  5. I do something similar to the entire object now. I add a little bit of grays and browns over the entire object to match the various tones and colors the artifact has in real life. I do this using a mix of dabbing and dry brush techniques and I try to be gentle and light about applying this layer.
  6. The final touch is to add a black detail towards the bottom corner of the concave side.
    black-feature
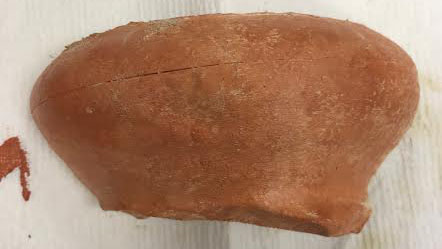
  7. This is the final product:

The final product is definitely not perfect, but it will do! Painted models, such as the olive jar neck sherd, can be implemented in educational demonstrations in classrooms, out in the field, in museums, or anywhere where archaeologists are able to interact with the public. I really hope that you enjoyed these blog posts about painting plastic artifacts and found some useful information. As always, feel free to respond with any questions or feedback.

Happy painting!


Mariana Zechini is a graduate student at the University of West Florida. She received her B.S. in Anthropology at Virginia Commonwealth University in 2014 and has four years of experience in 3D scanning archaeological materials. Her thesis focuses on analyzing stable isotopes from human remains from a medieval cemetery site in Berlin, Germany.

Painting the Past: Using Paint to Bring Plastic Artifacts to Life

Scanning and printing in 3D has many applications to the world of archaeology and one of the greatest is its utility in public archaeology demonstrations. However, because plastic models are usually printed in one solid color and are mostly hollow to speed up the printing process, the result does not look or feel much like the original artifact beyond its general shape. To remedy one of these disadvantages, we paint 3D printed models at the University of West Florida. We do this to make the artifact look more realistic and to create a more intimate relationship between the viewer and the artifact. By painting plastic artifacts, we allow the viewer to better understand the object and how it looked during use, after excavation, or following conservation.

mariana-painting
Here, I am painting a case shot from the Natural Bridge Battlefield Historic State Park. My station includes a variety of paintbrushes, acrylic paints and lots of paper plates, cups, and towels. (Image by author)

After I started painting models at the Virtual Curation Laboratory at Virginia Commonwealth University, under Dr. Bernard Means, I began 3D printing and painting for Dr. Kristina Killgrove and the Archaeology Institute at the University of West Florida. Along with some other graduate students, we have painted various types of artifacts from different sites, including hominin and animal bone. Below is a list of equipment needed for painting and some tips I have found useful throughout my experience. Additionally, I have included a step-by-step guide to painting, using an olive jar neck sherd from the Luna site.

homo-naledi-skull
This is a printed homo naledi skull from the Rising Star Expedition led by Lee Berger in South Africa. Digital images of bone are online for researchers to download and print. (Image by author)


jar-olive-melado
These are just a few of my favorite painted artifacts that I created throughout my time at UWF. Clockwise from left: an Apalachee jar, lead-glazed coarse earthenware, and an olive jar neck sherd. (Image by author)


Equipment

  1. A variety of brushes. Ideally, you want as many different types of brushes as possible so that you can re-create as many different patterns as possible. I suggest using any variety of skinny, round tip brushes, flat tip brushes, fan brushes, and angled tip brushes in small and large sizes. You will need the skinny, small brushes for detail and the larger flat tip brushes for larger surface areas. I suggest buying a variety pack of 20-30 brushes on Amazon and experimenting with those.
  2. Acrylic paint. My favorite brand to use is Liquitex Basics. If you are not sure what colors you will need, I suggest buying either the 24- or 48-pack of acrylic paint and seeing which colors you use the most. Or you can buy the 4oz tubes of the colors I have found I use the most (I have never needed the hot pink to paint a plastic model):
    1. Yellow Oxide, Titanium White, Burnt Sienna, Ivory Black, Red Oxide, Burnt Umber, Raw Umber, Raw Sienna, and Unbleached Titanium
  3. Paper plates and cups (or whatever you have at your disposal) for palettes and water cups. I usually use a paper plate as my palette and reuse it as much as possible. I do the same with a water cup and paper towels.
  4. Fixative (optional). I have never had a problem with paint wearing off a plastic artifact. However, if you know the object will be handled a lot, it might be useful to buy a can of spray fixative, which sets the paint and prevents it from rubbing off. Alternatively, hairspray can work as a cheap fixative if you’re in a bind.
  5. An open mind! I love painting plastic models because it combines my love of art and my love of the past. I was an art student for one semester, although I was planning to major in photography, not painting. This experience has been useful but is absolutely not necessary. I never thought of myself as a painter (and I still don’t) but keeping an open mind allows me to be more confident in my painting. So do not be afraid to mess up or try new techniques! The worst that can happen is that you have to paint over it and try again.
cannonball-1
Here you can see the different types of brushes that I use and the base coat of Unbleached Titanium I use on models. (Image by author)

Tips & Techniques

Below are some tips and techniques that I have found useful through my experience. These are only suggestions and it would be a good idea to experiment and see what works best for you!

  • I like to paint each object with one coat of Unbleached Titanium. This is an cream color that works as an excellent base coat by covering up the original plastic color and allows the following coats to be richer in color. It is not totally necessary, but if I accidentally miss a spot while painting, this base coat provides a more natural color (depending on the object, of course) rather than solid black, white, or gray, which are usually the colors that I print in.
  • Use different painting techniques! For example, I prefer to dabble rather than paint one even coat all over the object. Dabbling provides texture, which is absolutely necessary when representing artifacts. For example, dabbling helps to create the porous texture that most ceramics have and also adds an extra dimension to the object. Other techniques include washing, dry brushing, and stippling. For more info on painting techniques, check out this blog.
  • Let each coat of paint dry, especially the first coat! Layering the colors is much easier if each layer is dry. This prevents two or more paint colors from mixing and allows you to keep the texture of the object exactly how you want it. Plus, it makes for a less messy painting experience…or, at least, it helps.
  • Do not be afraid to mix paint to get the exact color you need. Sometimes the exact color we need to use does not come straight from the tube. For example, to get the perfect brown, I sometimes have to mix lighter shades in with darker shades, or add red, yellow, black, or white to get the tones right. Do not be afraid to experiment!
  • Use one color at a time. What I mean is, focus on one or two colors on the object and paint those all at once. This makes it easier for you to maintain the same colors throughout the object, especially if you had to make a custom color. This way, you don’t need to remember the exact ratios and colors.
  • Always use a clean brush whether it’s brand new or just washed. Accidentally mixing your last color with your newest color can mess up your work.
  • If you are painting ceramics that have a glaze over the artifact, I suggest using glue as the final step to create a shiny surface that mimics the glaze.
  • Do not be afraid to mess up! The best thing about painting is you can always paint over anything you do not like. Painting is very forgiving because no matter how many times you feel you may have messed up, you can always re-paint!
ramie-ceramics
These are some ceramics from sites along Garcon Point in Pensacola. The artifacts on the right are real and the ones on the left are painted. These were painted by graduate students Jane Holmstrom, Katy Patterson, and myself.

Depending on the artifact, painting can take a few hours. Overall, 3D scanning and printing can be a tedious process that is only lengthened (but greatly enhanced!) by painting. Scanning an artifact can take anywhere from 30 minutes to an hour and a half. Printing is the longest step that could take up to several hours, depending on the size and complexity of the model. The olive jar neck sherd, that I will walk you through next month, took approximately an hour to scan, an hour to print, and 30 minutes to paint. While these processes can be time consuming, they greatly enhance the public’s experience with archaeology!

I hope this painting tutorial helped give you some tips, tricks, and ideas for painting plastic artifacts in your very own lab! I would love to know what you think, so please feel free to leave any questions or comments!


Mariana Zechini is a graduate student at the University of West Florida. She received her B.S. in Anthropology at Virginia Commonwealth University in 2014 and has four years of experience in 3D scanning archaeological materials. Her thesis focuses on analyzing stable isotopes from human remains from a medieval cemetery site in Berlin, Germany.

Magnetizing Models: Creating an Interactive Model of a Civil War Case Shot

The University of West Florida’s Archaeology Institute houses one three-dimensional (3D) scanner and two 3D printers for individuals in the Anthropology Department to scan, print, and share artifacts. This fall, we decided to print and magnetize three refitting  Civil War case shot fragments from the Natural Bridge Battlefield Historic State Park and share our work at the Society for Historical Archaeology Conference in January 2017. The goal of this project was to create a tool so that visitors to the park can have a hands-on experience with the object.

The digital model of the case shot created by Tristan Harrenstein using photogrammetry.
nb-frag-plastic
The plastic models of the case shot fragments that were printed using the Fusion3 F306 printer housed in the Archaeology Institute. (Photo by authors)

So far, we have attempted to create a magnetized plastic model of the shell in two ways. For the first attempt, we placed magnets inside the model as it was printing. To do this, we used Simplify3D, the software associated with the Fusion3 F306 to create enough space within the model to fit the magnets. This was done by decreasing the infill percentage, a setting that controls how hollow or dense the model will be. We lowered the infill percentage to about 2%, just large enough for the magnets to fit within the model. We hot glued 12x13mm round ceramic magnets in the gaps within the plastic modeland waited for the plastic to slowly build around it. Using this method, someone has to “babysit” the printer and wait for the right time to insert the magnets.

This process took almost twelve hours, with the three of us (graduate student Katy Patterson helped) rotating responsibility every few hours. We were able to successfully implant the magnets and have other magnets stick to the edges, but the structural component of the model was very weak. When we tried to use the same method on a second fragment, many of the magnets were not strong enough to attract through the plastic, and because of the way the plastic model was situated on the printer, it turned out to be so structurally unsound that the model broke.

model-printing
One of the fragments being printed with the Fusion F306 printer. The blue arrow indicates the hollow area where the magnet would be placed. (Photo by author)

For the second attempt at magnetizing the case shot, we used the complete plastic models and drilled holes in them and placed smaller magnets inside. This method was more successful, although it is still a rough prototype. We increased the infill percentage to its normal rate and printed the three fragments using the Fusion306 printer. After the three fragments were printed, we took a Dremel and drilled into the edges of each model, making about 2-3 holes per edge.

magnetized-model-2
Our second attempt turned out to be successful, albeit, a rough prototype. (Photo by authors)

Once again, we inserted magnets but this time we used smaller, stronger neodymium Rare Earth Magnets from Harbor Freight Tools. We placed them in the holes and secured them with super glue. Our second draft of the model worked! Although it was a very rough version, the three fragments stuck together and it can still be a great tool for teaching students, visitors, or researchers about the artifact.

Our third draft will be an edited version of our first. We plan on inserting the smaller and stronger magnets into the plastic model as it prints. This will allow for the infill percentage to be high enough that the structural integrity of the model will not be compromised and for the magnets to be attracted through the plastic.

Tristan Harrenstein has also suggested an alternative method would be to create a space for the magnet in editing software like Blender and insert the magnet after printing. Creating plugs to fill the remainder of the space created would allow for a more visually coherent model than the drilled method, while being less time consuming than the embedded method.

We look forward to seeing the outcome of these two methods and stay tuned to find out how it went!


About the Authors

Mariana Zechini is a graduate student at the University of West Florida. She received her B.S. in Anthropology at Virginia Commonwealth University in 2014 and has four years of experience in 3D scanning archaeological materials. Her thesis focuses on analyzing stable isotopes from human remains from a medieval cemetery site in Berlin, Germany.

Janene Johnston is a graduate student at the University of West Florida. She received her B.A. in Anthropology at Eastern Kentucky University in 2011 and has worked as an outreach assistant with the Florida Public Archaeology Network for three years. Her thesis focuses on surveying and analyzing the Natural Bridge Battlefield, a Civil War site near Tallahassee, Florida.